×

Subscribe to our newsletter!

Get 5% off your next order by signing up.

Self-leveling pedestal 50/65 mm for slabs, tiles or ceramics - Rinno Plots
  • Self-leveling pedestal 50/65 mm for slabs, tiles or ceramics - Rinno Plots
  • Self-leveling pedestal 50/65 mm for slabs, tiles or ceramics - YEED
  • Self-leveling pedestal 50/65 mm for slabs, tiles or ceramics - YEED

Self-leveling pedestal for slab terrace 50/65 mm - YEED

RIN025040DAUT
YEED

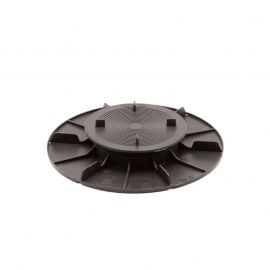
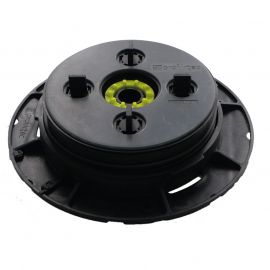
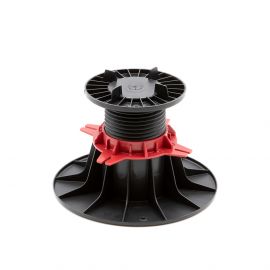
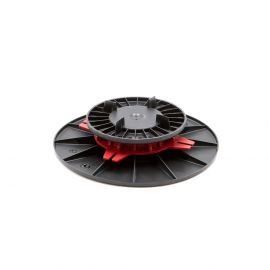
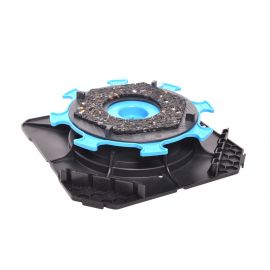
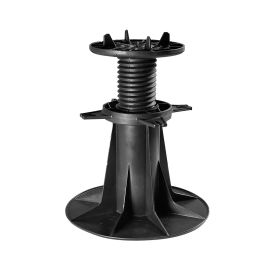
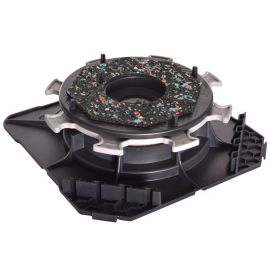
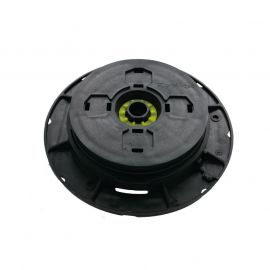
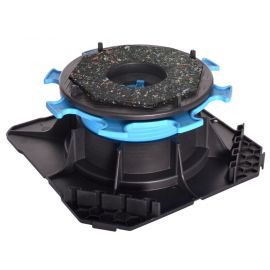
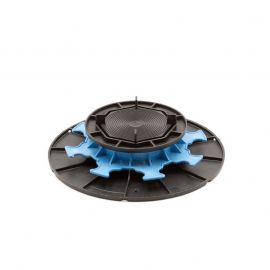
Self-leveling pedestal for tiled terrace / concrete slab Size: 50/65 mm. For more comfort, consider anti-noise damping wedges! Wedge sold separately.

More details
 

Expédition des commandes en 24/48h


Livraison offerte dès 500€


Paiement en 3 ou 4x avec Oney


Service client du lundi au vendredi

Meilleur prix garanti
€3.70
Tax included
Available stock
3818 Items
Quantity

Calculate quantities
You might also like
Description
Dessin technique du plot dalle autonivelant 50/65 mm de Yeed

Adjustable self-leveling pedestal from 50 to 65 mm for pedestal terrace - YEED (Ex Rinno)

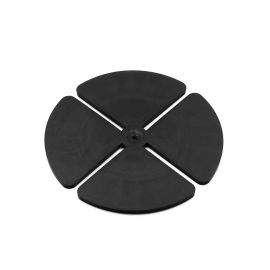
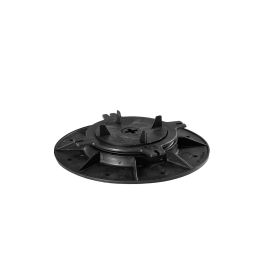
The self-leveling paving pedestal is adjustable from 50 to 65 mm to adapt to the constraints of your land. Its particuliarity ? It is composed of a self-leveling plinth at its base. This self-leveling disc allows it to catch up or create up to 5% slope over 1 meter. It is therefore a slab terrace pedestal perfect for laying on sloping or uneven ground. Solid, resistant and stable, it ensures a long service life for your tiled terrace on pedestals.

The advantages of the YEED 50/65 mm self-leveling paving terrace pedestal (Ex Rinno)

  • Quick and easy installation, without structural work, fixing or seals.
  • Allows laying on sloping or uneven ground
  • Allows you to create or compensate for up to 5% slope over 1 meter
  • Allows good ventilation of the structure and the evacuation of rainwater
  • Manual height adjustment thanks to the adjustment ring
  • Has 4 spacers to define a regular spacing of 3 mm between the paving tiles.
  • Separable spacers to obtain a smooth head, ideal for laying on the edge
  • Allows the passage of cables and pipes

Prerequisites: define the type of installation then draw up the layout plan

Before starting your terrace on pedestal construction site, it is essential to think about it: what type of installation do you want? what will be the surface of your terrace? etc

For laying, several layouts are possible: straight laying, staggered laying or diagonal laying… the type of laying chosen will depend on the layout of your slab terrace pedestals. Once you have chosen the surface and type of laying for your future tiled terrace, put your ideas down on paper.

The layout plan is a scale sketch of your terrace. It represents its shape, its dimensions... But also the pedestals, placed in the right place and correctly spaced (the width of your pavings). This drawing will allow you to accurately calculate the number of materials needed, saving you time and money. In short, an essential step!

Tip for calculating slab terrace pedestals: a pedestal is supported by 4 pedestals, 5 from 60 x 60 cm and 6 from 60 x 120 cm.

Ground preparation

Preparing the ground is a mandatory step, even if you opt for self-leveling pedestals. It will allow you to stabilize the ground and guarantee your terrace on pedestals many years of use. Indeed, by working the ground you avoid the inconveniences linked to climatic conditions (drought and heavy rain) and the weight supported by your terrace. By preparing the ground, you prevent your tiled terrace on pedestals from moving.


In addition, self-leveling pedestals are ideal for laying on crushed gravel. Indeed, a ground preparation with gravel never offers a perfectly flat ground. This is where the self-leveling paving terrace pedestals come in brilliantly, adapting perfectly to your uneven ground.

1/ Tools and materials needed for ground preparation

With self-leveling paving pedestals, simplified floor preparation is recommended. Thus, it will cost you little in materials:

  • A cord
  • Stakes
  • A spirit level
  • A shovel
  • A tape measure
  • A mason's box screed
  • A geotextile film
  • Crushed gravel

2/ How to prepare the ground

In order to prevent your terrace from shifting over time, simple, quick and inexpensive ground preparation will be useful.

  1. Define the shape of your terrace and dig 15 cm deep;
  2. Lay a geotextile felt to prevent the growth of weeds between the tiles;
  3. Backfill with crushed gravel: 0/60 mm over 10 cm and 0/4 mm over the top 5 cm;
  4. Compact everything to obtain a stable surface.

Steps for laying a paving terrace on YEED self-leveling pedestals (Ex Rinno)

Laying a tiled terrace on pedestals is very simple, especially with self-leveling pedestals! Count a day of work to get your new paving terrace on pedestal out of the ground!

1/ Tools and materials needed to lay your tiled terrace on self-leveling pedestals

  • A tape measure
  • A chalk line
  • A spirit level
  • A mason's box screed
  • A water saw
  • a laser
  • YEED self-leveling slab pedestals (Ex Rinno)
  • Your tile covering

2/ Accessories for laying a tiled terrace on a YEED pedestal (Ex Rinno)

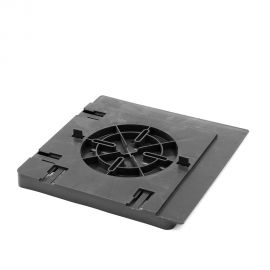
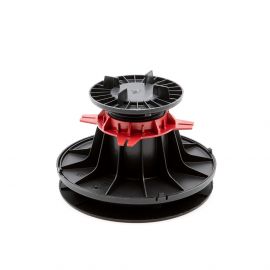
We recommend a few accessories to make it easier for you to install your new slab terrace and to increase your comfort of use:


  • paving carrier to lift and move tiling tiles without hurting your back;
  • Anti-noise shims to limit vibrations and offer you optimal acoustic comfort;
  • Insulation pads
  • The 60 mm extension to increase the height of your slab pedestal without changing it
  • Paving plates to stabilize the tiles located against a wall and at the ends of your terrace;
  • The YEED ClipSystem for making side closures.

3/ Arrange the pedestals on the ground

  1. Start by placing the paving pedestals along a wall or at the edge of the surface to be covered if necessary. Space the pvc supports the width of your tiles. This over the entire length of your terrace.
  2. Adjust the height of the paving terrace pedestals by turning the adjustment nut clockwise.

4/ Lay the paving

  1. Lay the paving plates on the pedestals against the facade and at the edge of the terrace;
  2. Place a noise-reducing shim on each of the pedestals and on the paving plates;
  3. Remove the two lugs on the paving plate;
  4. Lay your first paving on the paving plate starting in a corner of the terrace;
  5. Check the squareness of the laying to facilitate the laying of the other tiles;
  6. Continue by laying the tiles on all the paving pedestals located against the wall;
  7. Stop before the last row of pedestals;
  8. Continue on the second row and so on;
  9. For the last row, it may be necessary to cut the tiles across their width. If this is your case, use a wet saw with a diamond blade suitable for tiling.

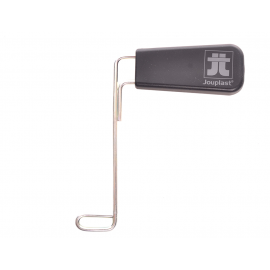
Important: after each laying of the paving, be sure to check the flatness of the terrace using a spirit level.

Technical characteristics

  • Complies with DTU 43.1
  • Frost and UV resistant
  • Supports up to 1 ton of load
  • Height adjustable from 50 to 65 mm
  • Base diameter: 200 mm
  • Head diameter: 120 mm
  • Spacers: 15 mm / Thickness: 3 mm
  • Recycled and recyclable product
  • Made in France

Product Details
RIN025040DAUT
3052350898438
3818 Items

Data sheet

Height
From 4 to 8 cm
Color
Black
Material
Polypropylene
Guarantee
10 years warranty
Origin
Manufactured in France
Conformity
Compliance with the DTU 43.1 and 51.4
Resistance
Resistant to acidic and basic solutions, atmospheric agents, temperatures between -40°C and +60°C
Load
Resists the test of crushing with a load superior in 1 ton
Brand
YEED (Ex Rinno)
Type
Adjustable
Self-levelling
Adjustable height
50 to 65 mm
Compatibility with extension
No
SH Code
39259010
Country of Origin
UE
Spacer thickness
3 mm
Best-price
Yes
Installation surface
Uneven/Inclined ground
Type of setting
Manual
Attachments
Download
16 other products in the same category: