
Get 5% off your next order by signing up.


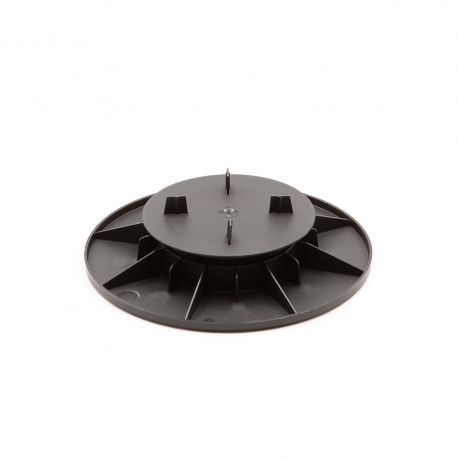
Pedestal for tiled terrace, concrete paving or grating with a minimum thickness of 2 cm. Height adjustable from 25 to 40 mm using the adjustment ring located under the head. Can be placed on any support without fixing and does not require a joint. Installation in less than 3 days: provide 4 studs per slab. Max load: 1 ton. Robust, the pedestal resists frost, UV, temperatures from -40° to +60°. Complies with DTU 43.1 and 51.4, made in France. 10 year warranty. For more comfort, think about anti-noise damping wedges! Wedge sold separately.
Expédition des commandes en 24/48h
Livraison offerte dès 500€
Paiement en 3 ou 4x avec Oney
Service client du lundi au vendredi

Adjustable paving pedestal from 25 to 40 mm, this pvc support allows you to easily create the foundations of your terrace in tiles, porcelain stoneware, concrete paving or wooden gratings. This tiled terrace pedestal can be placed on any support without fixing and does not require a joint. A spacing of 3 mm will naturally be in place thanks to the spacers located on the head of the paving pedestal. Thanks to the latter, the installation of your terrace is easy and fast. The construction is solid, secure and stable.
Before starting your project, it is essential to think precisely about your terrace project and in particular the type of installation you want. Straight laying, staggered laying or diagonal laying… The position of your pedestals for paving will depend on the type of laying. It is therefore imperative to choose the final rendering of your paving terrace upstream. Once this choice is made, place the layout plan!
The layout plan is a scale sketch of your terrace. It represents its shape and dimensions but also your paving pedestals, your covering. Be precise, space your pvc supports by the width of your tiles to be able to reliably calculate the material necessary for the construction of your tiled terrace on pedestal.
To calculate the pedestals, remember that a tile is supported by 4 paving pedestals, one at each end. For large slabs, from 60 x 60 cm, provide an additional central pedestal. Two central pedestals may be necessary for long slabs such as 60 x 120 cm which will require a total of 8 pedestals: 3 pedestals on each side and two central ones. To place these central pedestals under the paving, do not forget to break the spacers.
To optimize the use of your paving terrace pedestals, ensure the necessary stability and longevity of your tiled terrace on pedestals, it may be necessary to prepare the ground beforehand.
Is your floor stable and level? It's perfect, you don't have to prepare the ground. Proceed directly to laying the terrace pedestals.
On rough ground such as soil, grass or any other type of ground, it is essential to carry out some small earthworks.
Rest assured, ground preparation is simple, relatively quick and inexpensive.
When laying your tiled terrace on pedestals, accessories will be useful to you, here they are:
Data sheet
Reference: PRO-SUPAS-SUPA4

Reference: JOU-IH095155DSN0000

Reference: JOU-IH080140DS10000

Reference: JOU-IH040060DS10000

Reference: JOU-IH029039DSN0000

Reference: JOU-IH140230DS10000

Reference: JOU-IH080130DNC0000

Reference: JOU-IH040055DNC0000


Pedestal for tiled terrace, concrete paving or grating with a minimum thickness of 2 cm. Height adjustable from 25 to 40 mm using the adjustment ring located under the head. Can be placed on any support without fixing and does not require a joint. Installation in less than 3 days: provide 4 studs per slab. Max load: 1 ton. Robust, the pedestal resists frost, UV, temperatures from -40° to +60°. Complies with DTU 43.1 and 51.4, made in France. 10 year warranty. For more comfort, think about anti-noise damping wedges! Wedge sold separately.
check_circle
check_circle